Software Installation
The purpose of this demo post is to get you set up with the software tools we’ll use in PIC16B, including Anaconda, git + GitHub, and Jekyll. This post is not graded, but it is extremely important – you won’t be able to complete other graded assignments until you complete these directions.
§1. Install and Configure Anaconda
An important part of PIC16B is navigating the Python package ecosystem. We will do so using the Anaconda distribution of Python. Getting set up with Anaconda is a somewhat detailed process, outlined below.
You should follow these instructions even if you already have Anaconda installed. Uninstalling and reinstalling is recommended.
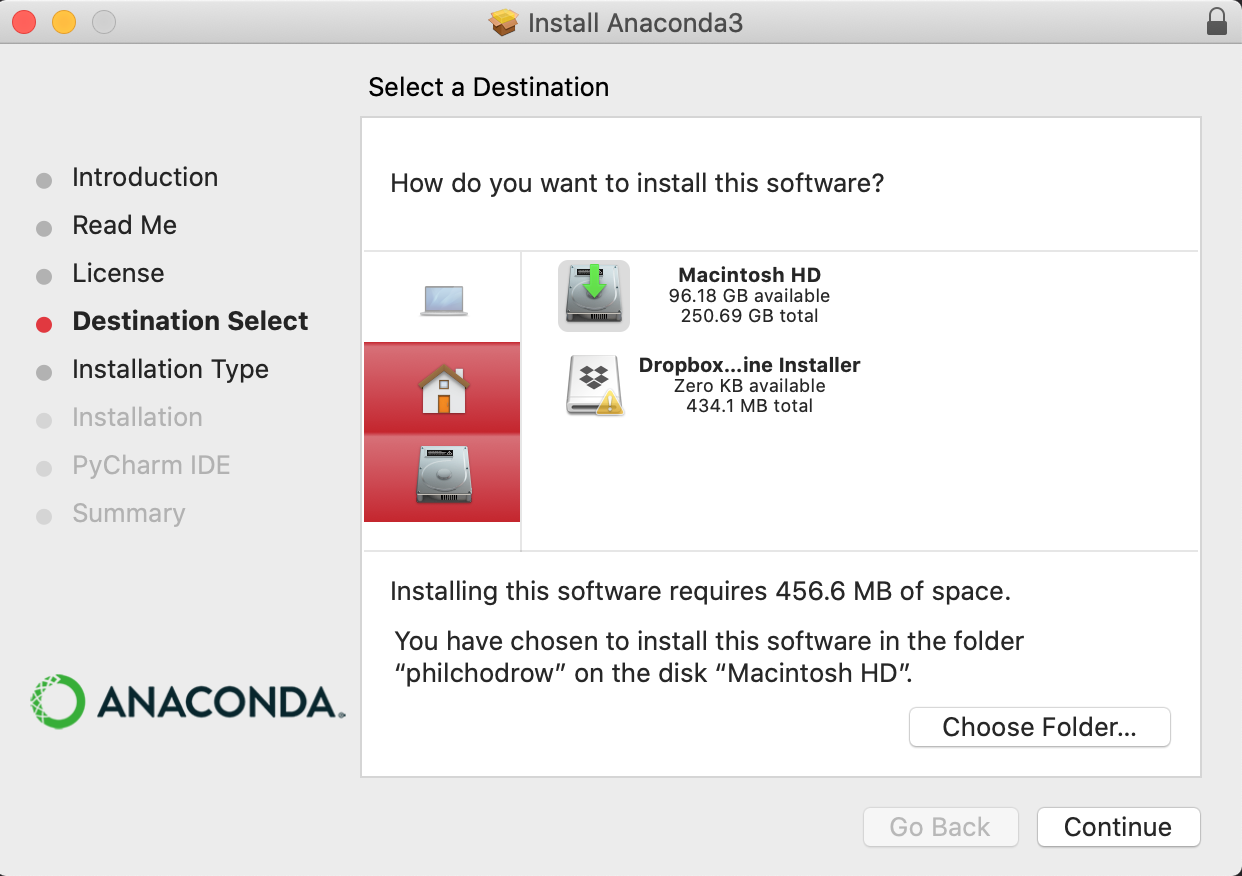
§a. Install Anaconda
You can find installers for Anaconda here. Choose the one appropriate to your operating system.
If installing on macOS, do not install Anaconda in the root-level opt directory. It is recommended that you install in the folder directly under your username. This is the same folder in which your “Downloads” folder exists. In some cases, Anaconda may suggest installing in a folder called opt under your username; this is fine.
§b. Create the PIC16B Anaconda Environment
- Open Anaconda Navigator.
- Navigate to the Environments tab.
- Choose “Create.”
- Create a Python environment named “PIC16B.”

§c. Install nb_conda
Still in the Environments tab, search for the nb_conda package on the right-hand side (you may need to update the index).
Check the box beside this package, and then click “Apply” to install.
§d. Install Packages
While you’re here, you may also wish to install some other familiar packages, such as matplotlib and pandas. In the future, if you ever attempt to import a package and encounter an error, you should attempt to install it via the Environments tab.
In this course, we’ll primarily demonstrate using TensorFlow from Google Colab, which has some significant benefits related to speed of computation. However, you can also try to install the tensorflow package via the package manager.
Note: at the time of writing (September 2021), TensorFlow is not stably compatible with recent (M1) Macs.
§e. Launch Jupyter Lab
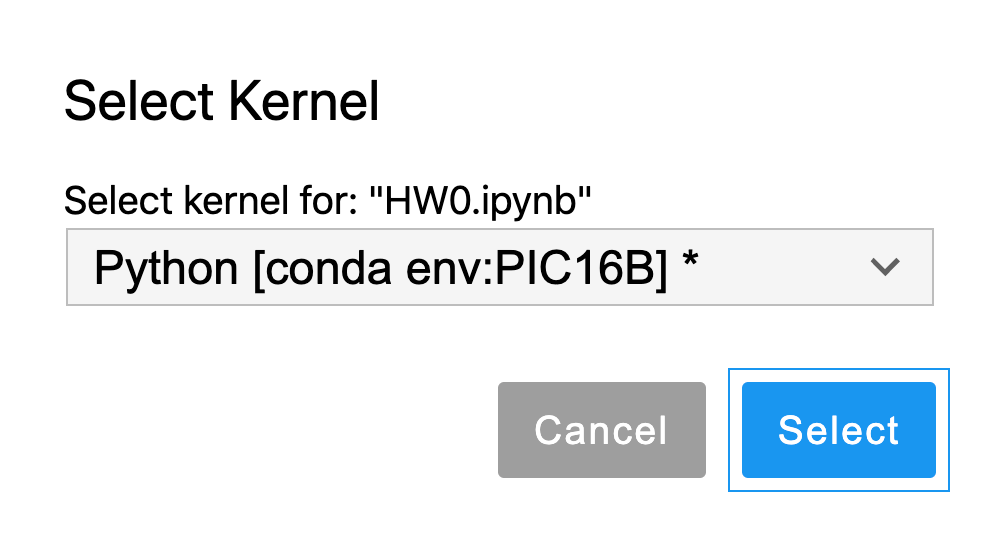
Now go back to the “Home” tab. Launch JupyterLab. You may need to install the app first.
Create a new Jupyter notebook. Change the kernel to the PIC16B environment that you created in Step §2
§f. Verify
Type the two lines below into your blank Jupyter Notebook and run them, adding in your name. If you do not encounter an error, then your setup was successful. Take a screencap of the result and submit it on CCLE. Otherwise, contact the instructor or TA for help.
import pandas as pd
print("My name is [your name] and I installed Anaconda and Pandas")
§2. GitHub
Create an account on GitHub.
§3. GitHub Desktop
Download GitHub Desktop, a graphical client for working with git. If you do not use GitHub Desktop (or another graphical client), you will need to work with git from the command line.
Connect your GitHub Desktop app to your GitHub account.
§4. Install and verify Jekyll
In this course, we’ll use the Jekyll static website generator to create a simple, attractive website on which to host our homework and project submissions. Installation of Jekyll requires some minimal use of the command line (terminal), but the instructions will guide you through it.
- Install Jekyll on Windows
- Install Jekyll on macOS
- Install Jekyll on Ubuntu or other Linux systems.
Once you’ve followed these instructions, verify your installation. To do so, run the following command in your terminal:
jekyll -v
The terminal output should look something like this:
jekyll 4.1.0
Your exact version number may be different. If you see a version number of 4.0 or above printed, you are good to go! Nice work.
Some users may need to run the following command after following the other steps in order for Jekyll to run correctly.
gem install --user-install ffi -- --enable-libffi-alloc
§5. (Recommended): Install a Text Editor
Text editors are software for editing text files. You’ll use text editors in PIC 16B to write Python script files and to create your blog posts.
It’s worthwhile to find a text editor that you like. I personally prefer VSCode, and open it up almost every day. You may have VSCode installed by default through Anaconda. Sublime Text is another excellent option.
Once you’ve installed a text editor that you like, try opening it up and modifying a text file.
Next, try writing a simple Python file and running it from your editor. To do this, first paste the following into a file called my_script.py:
print("I can run Python scripts from my text editor!")
Then, open a terminal window from your editor (this is ctrl + in VSCode). In the terminal, write python3 my_script.py and hit enter. You'll need to ensure that your terminal is in the same location as the file my_script.py`. We’ll learn more about how to use the terminal and text editor in an upcoming Discussion activity.