Hello, Jekyll
In this post, we’ll get set up with Jekyll. Jekyll is a static site converter, which you can use to turn plaintext documents into attractive webpages.
Pre-Work: Install Jekyll
You should have already installed Jekyll when completing the software installation activity.
To get the most out of this activity, you should install Jekyll ahead of time. In case you haven’t yet, there are two steps:
- Install Ruby.
- Install Jekyll.
If you are on macOS, Ubuntu, or another Linux distribution, these steps should be relatively simple. If you are on Windows, installation might be slightly more complex. We recommend using the instructions under “Installation via Bash on Windows 10.”
Some users on recent Mac laptops may need to run the following command after following the other steps in order for Jekyll to run correctly.
gem install --user-install ffi -- --enable-libffi-alloc
Optional Pre-Work: Install a Text Editor
Text editors allow you to make modifications to plaintext files. They are useful for coding, writing, and any other tasks that require the manipulation of plaintext.
Jupyter Lab, which you may have used before, includes some basic text editor capabilities. You might, however, have a better experience with a dedicated text editor program. Visual Studio Code is my personal choice. Sublime Text and Atom are also popular. Beyond this course, if you expect to write a significant amount of code in your career then it is worthwhile to find a text editor that you like.
 Blogging with Jekyll and Visual Studio Code.
1. Fork Your Blog
Your first step is to fork the GitHub repository which contains a template for your blog. Although this repository contains noticeably more files than the one we practiced with, the process of forking is almost exactly the same. Just click the “Fork” button on the top right of the GitHub page.
There’s a small additional point this time. After you fork the repository, go to Settings and chang the repository name to
[your GitHub username].github.io
For example, my username is PhilChodrow, and so I would rename the repository to PhilChodrow.github.io.
Congrats! You now have all the files you need to create your personal blog.
2. Publish Your Blog
Now, go Settings again, and scroll down until you see the GitHub Pages section. Publish your blog! Don’t modify any of the other settings.
Wait a few minutes, and then navigate to
https://[your username].github.io/
If you see a webpage there, congrats! Your blog is up and running. At the moment, it’s just a copy of the template, so it’s not personalized in any way.
3. Clone Your New Blog
Your next step is to clone your blog. Make sure that you clone your blog (the fork that you just created) and not the original template.
Although this repository contains noticeably more files than the one we practiced with, the process of cloning works in exactly the same way:
- Click the big green Code download button.
- Choose “Open with GitHub Desktop.”
- Wait a moment for the files to download.
4. Look Around
Open up the repository that you just cloned in a file explorer, and take a look around. It should look something like this:
[username].github.io
├── _includes/
├── _layouts/
├── _posts/
├── _sass/
├── _site/
├── images/
├── notebooks/
├── 404.md
├── CNAME
├── LICENSE
├── README.md
├── _config.yml
├── about.md
├── index.html
└── style.scss
You won’t need to touch most of these files, but we’ll soon take a quick tour.
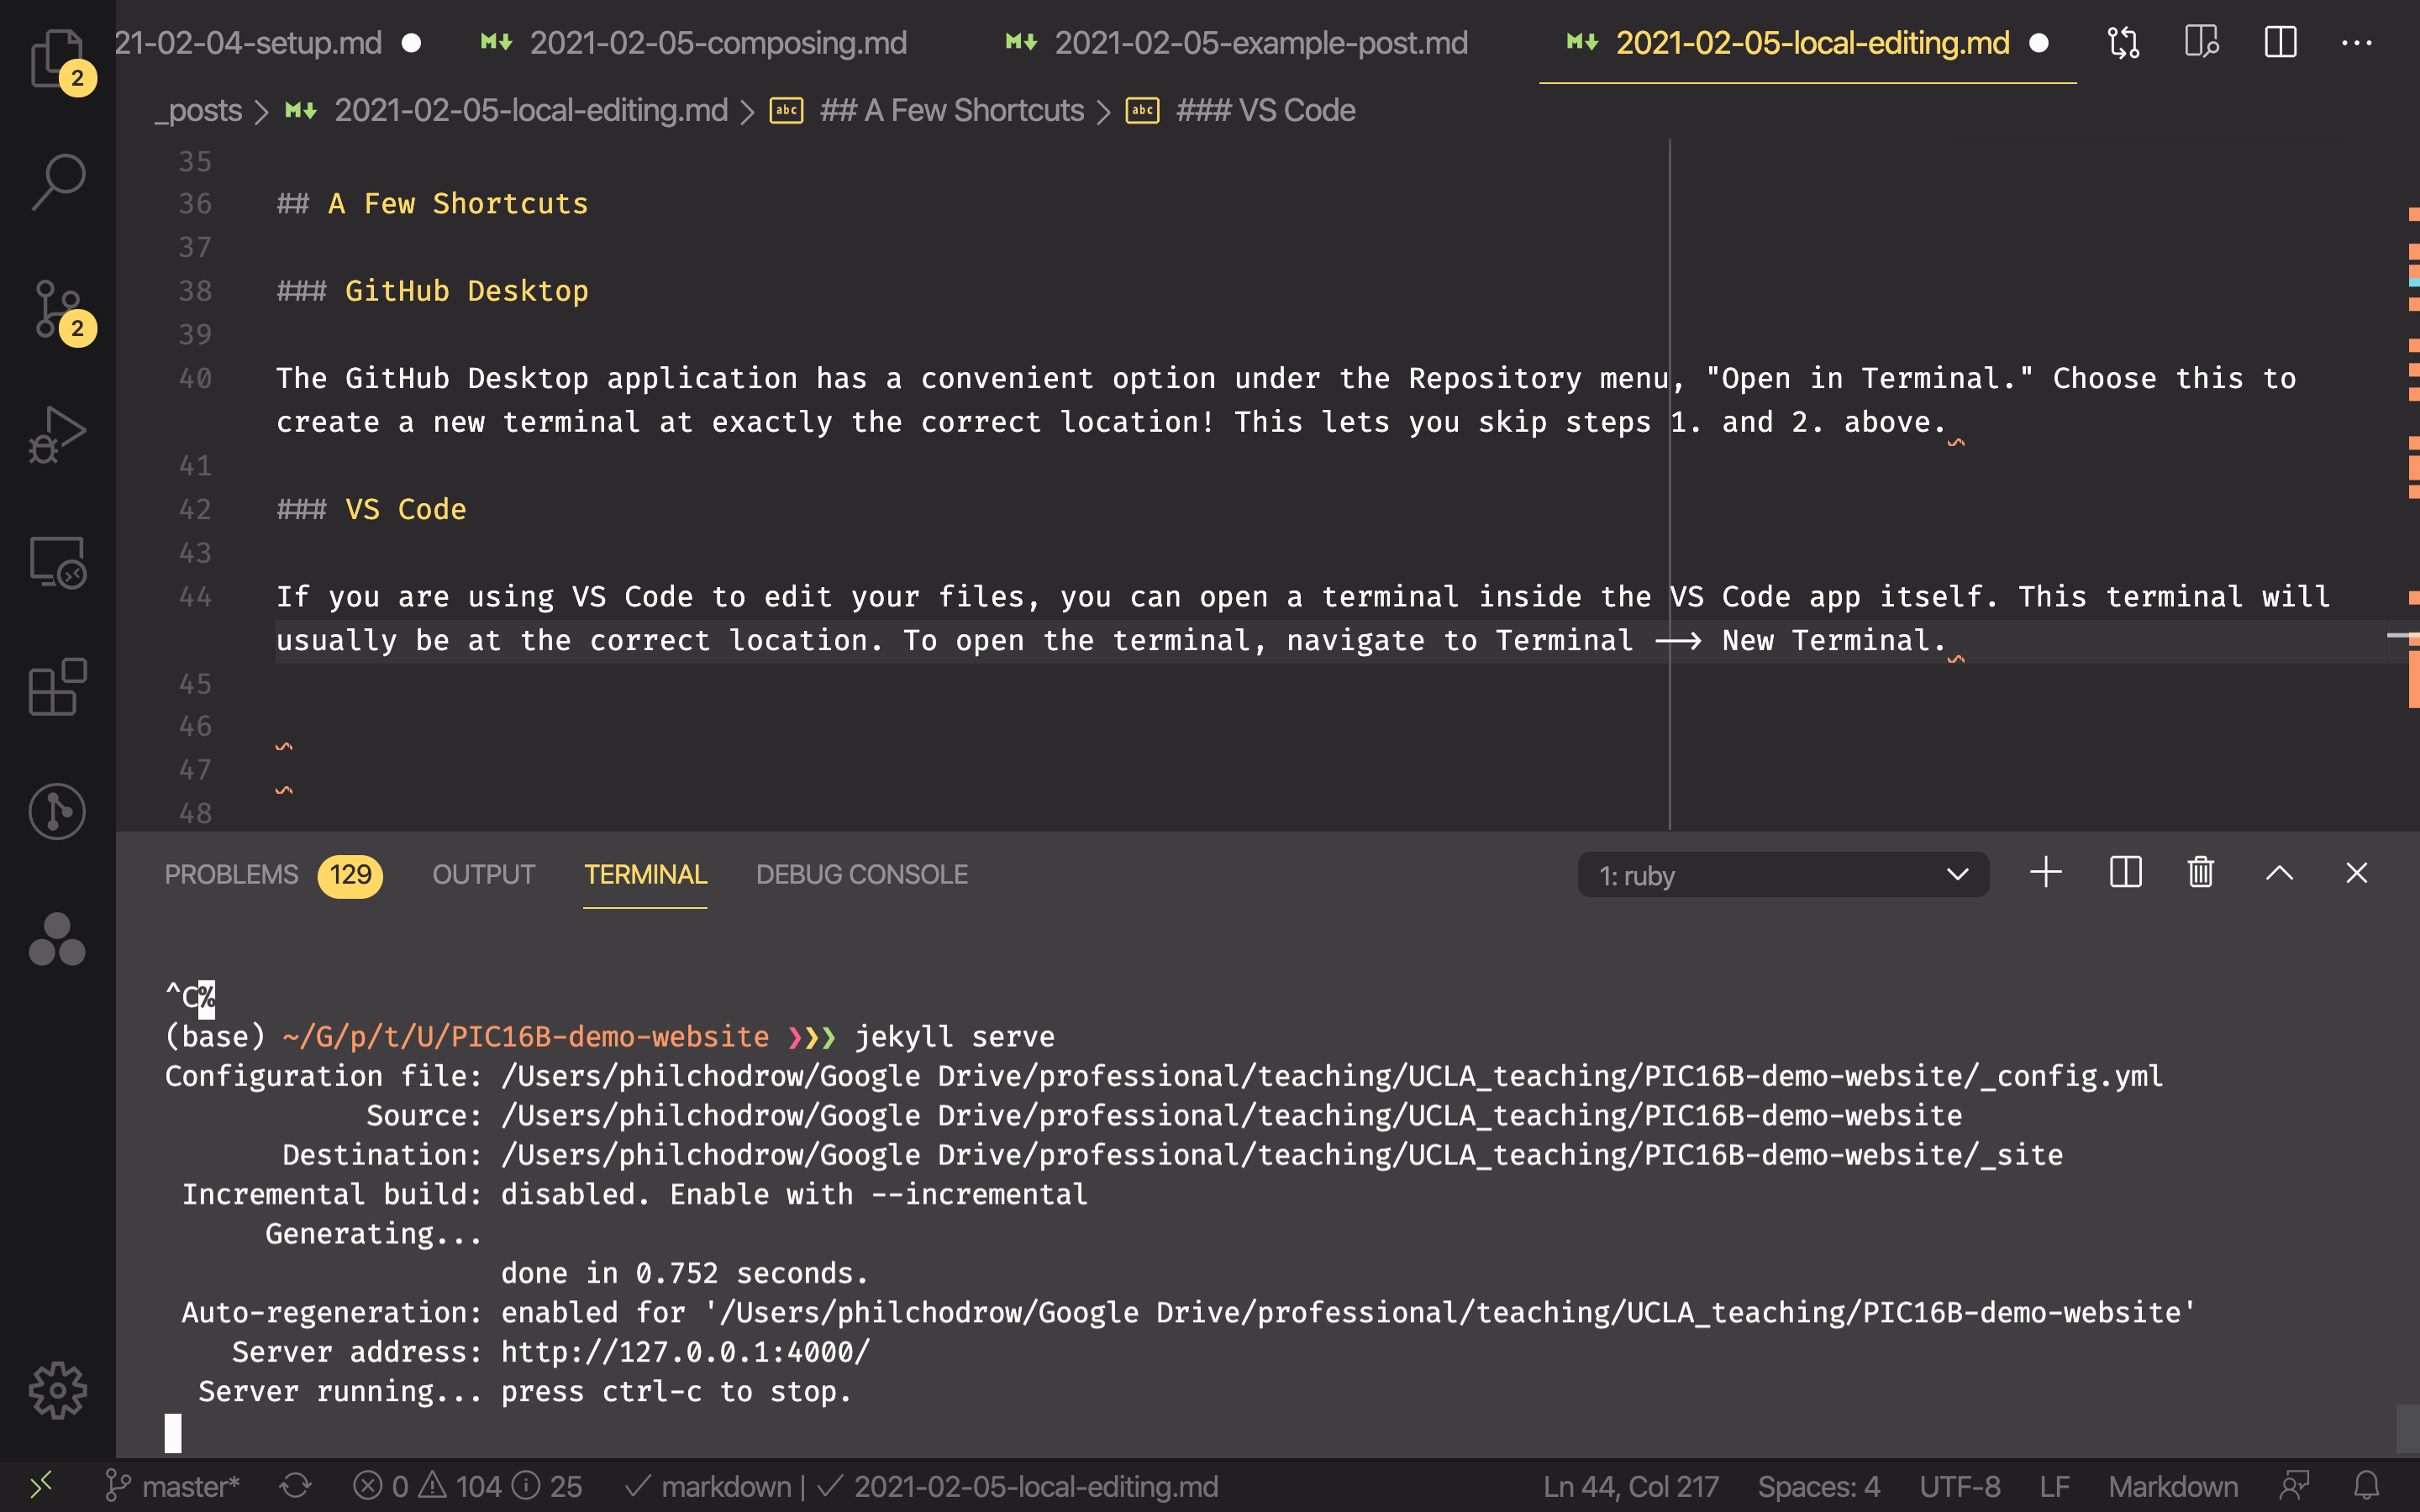
5. Serve Your Blog Locally
Serving your blog locally allows you to preview what your site will look like before you place it online. This is what we actually need Jekyll for.
Open up a terminal or command line, and navigate to the location where you cloned your website. The easiest way to do this is actually via GitHub Desktop: go to Repository -> Open in Terminal. You can also navigate manually using the cd command if you are already comfortable with the command line.
Once you’re in the right place, type the command
jekyll serve
You’ll need to wait a few seconds. Eventually, you should see the following two lines in the terminal:
Server address: http://127.0.0.1:4000/
Server running... press ctrl-c to stop.
Navigate to http://127.0.0.1:4000/ in your browser. You should see an exact copy of the blog! This copy isn’t online; it’s running directly on your computer. This allows you to (a) preview changes more rapidly than you can by editing on GitHub and (b) work on your blog using a text editor, which is usually more comfortable than the file modification interface on GitHub.
6. Add Your Name
Still on GitHub, find the file _config.yml. Click the pencil icon to edit the file. Change the name and description fields. Anything is fine! You’re encouraged but not required to use your real name.
In a few moments, your website will update with the new information. Now it’s yours!
For now, move on to the next step.
7. Make a Post
Starting with this step, it is a good idea to commit each time you make a significant addition to your site.
Create a file called 2021-04-01-test-post.md in the _posts directory. Open the file in a text editor, and add the following text at the top of the post:
---
layout: post
title: My First Post!!
---
Next, add some text. Any text will do:
I'm an awesome PIC16B student and I am running Jekyll!
Now, in your browser, navigate to your homepage (http://127.0.0.1:4000/). You should see a new blog post with title “My First Post” appear on the local version of your site. Click into it and observe that the text you added is now there.
8. Modify Your Post
Try making a header:
### Third level header (number of # controls level)
Try making a numbered or bulleted list.
Try adding math! If you are familiar with the \(\LaTeX\) typesetting system, you can use many standard commands by enclosing them in double $ symbols. For example, $$f(x) = e^x$$ will be rendered as \(f(x) = e^x\).
Add code! When talking about a short concept, like the np.random.rand() function, you can type back ticks like this: `np.random.rand()` and just incorporate it into a paragraph of text. To create a larger block of code, use three consecutive backticks ``` to both open and close the code block. If you place the word python immediately after the opening code blocks, you’ll get attractive syntax highlighting:
def f(x):
    """
    A cool function that multiples an input x by 2.
    """
    return 2*x
To display code output, leave off the python syntax highlighting in order to distinguish between code and code output, which is usually not highlighted:
print("to boldly go")
to boldly go
9. Images
You can and should include images in your posts, especially in cases where you have created a data visualization. If the image is already available online, you can link to it using the syntax :

In cases in which your code produces an image, you should save the image (such as via plt.savefig()), then save it in the images directory. You can then embed it directly under the code that generates it on your blog post, using the syntax

For example, here’s how to show code along with the plot that it generates.
import numpy as np
from matplotlib import pyplot as plt
x = np.linspace(0, 2*np.pi, 1001)
y = np.sin(x)
plt.plot(x, y)

To create this example, I first ran the code in a Jupyter Notebook, and added the line plt.savefig("image-example.png") to save the result. I then moved the file image-example.png to the images/ directory of my blog. Finally, I added the line

immediately beneath the code block. Just replace PIC16B with the base URL of your own site.
10. Push!
Once you’ve made all these additions to your test post, publish the result. To do so, make sure you have committed all your changes in GitHub Desktop, including any files you may have added. Once you’ve done so, push! In a few minutes, you should see your new post on your website.